
Choosing the Right Crystal Resin
Understanding Crystal Resin Types
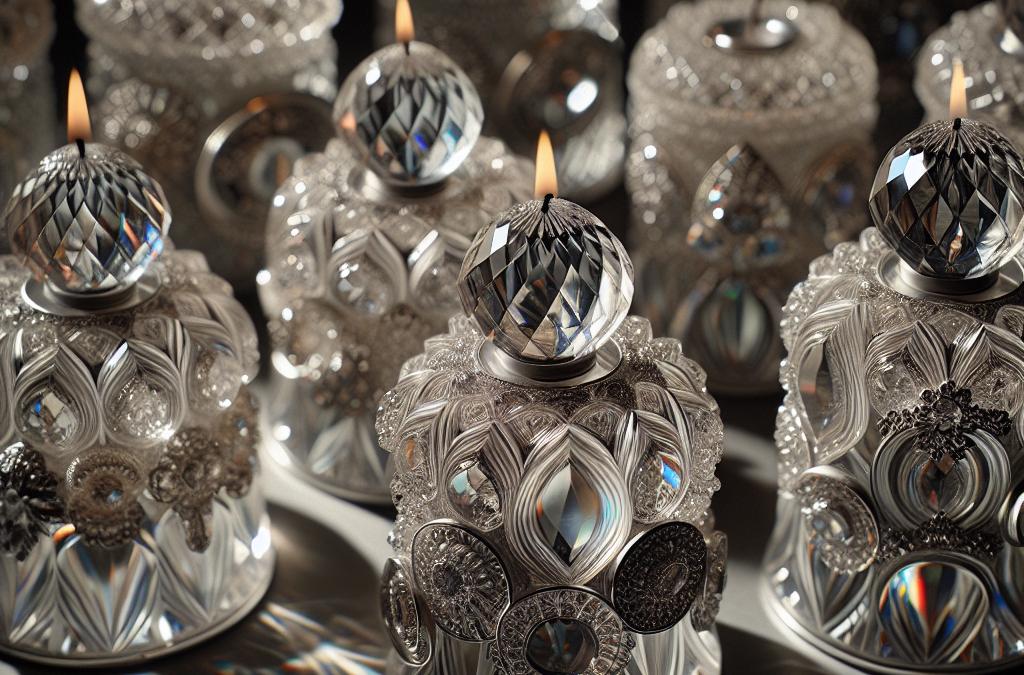
When I first got into making crystal resin candles, I was overwhelmed by the variety of resins available. It’s important to know that not all resins are created equal! There’s epoxy resin, UV resin, and polyester resin, each with unique properties. I found that epoxy resin is the most popular for candle-making due to its durability and glossy finish. It’s perfect for achieving that stunning crystal look.
UV resin is great if you’re short on time since it cures quickly under UV light. It’s more commonly used in small projects, but for larger candles, I recommend sticking with epoxy. Don’t forget to read the label and make sure the resin you choose is non-toxic, especially if you’re burning these candles later on.
Looking for Hand-Crafted and Unique Candle Designs?

Lastly, polyester resin is another option but is often less favored because of its strong odor and the fact that it can be a bit brittle. Understanding these materials is key! Pick the one that suits your needs best for a perfect end result.
Sourcing Quality Resins
Once you know what type of resin you want, it’s time to source it. I recommend checking out local craft stores, but also don’t underestimate online stores. Places like Amazon or specialized craft websites usually provide a wider selection. Just make sure to read reviews and maybe even connect with other crafters to get their suggestions.
When I started, I bought several small kits to experiment. This was a game-changer! It helped me understand the properties and how different additives change the final outcome. Additionally, don’t hesitate to reach out to local crafting communities online. They often have tips on the best suppliers.
Lastly, keep an eye out for seasonal sales or discounts. Buying in bulk can save you a ton of money. Trust me, the right resin can elevate your project from ordinary to extraordinary!
Experimenting with Color and Additives
This part is where the fun really begins! Adding color to your resin candles is like opening up a box of crayons as a kid; you can really let your creativity shine! I’d suggest starting with opaque colors or pigments that are specifically designed for resin. They give a deeper color payoff than standard craft paints.
You can also throw in some sparkles or specialty additives like dried flowers or glitter to give your candles a unique touch. I remember making one with some lavender buds, and it turned out so beautifully rustic. The best part? They smelled amazing when lit!
Try to include a few test batches to see what you like best. Sometimes, the combinations you think won’t work end up being a hit. It’s all about trial and error in the beginning to find your signature style.
Creating Your Mold
Choosing or Making a Mold
Creating a mold is essential for shaping your resin candles. While you can buy silicone molds specifically designed for candle-making, I personally love making my own. You can use materials like silicone caulk or even playdough to create molds that suit your specific design.
Your imagination is the limit here! Just remember to apply a release agent, like cooking oil, to make sure your candle comes out smoothly once it’s cured. I remember my first attempt at molding—I was a bit impatient, and let’s just say some candles faced a tough exit!
If you’re not into DIY, definitely look for unique molds online. There are great options available that can really add character to your candles.
Mixing Your Resin Properly
Mixing resin might sound simple, but there’s definitely a technique to it. I learned the hard way that you should be careful not to whip it up too much, as this can create bubbles. Using a wooden stick, mix slowly for at least 2 to 3 minutes ensures everything’s well blended.
You can also use a heat gun or a torch to pop any bubbles that form after pouring. That’s something I wish I had learned sooner! You want all that hard work to shine through without any imperfections.
Remember to measure the resin and hardener correctly if you’re using a two-part system; inconsistent ratios can lead to stuck candles or incomplete curing. I always keep a handy scale to avoid these mishaps.
<h3:Pouring Techniques
Pouring your resin into the mold should be done with care. I usually start at one corner and let the mixture flow gently to avoid trapping air bubbles. You’d be surprised how much of a difference this can make. I once poured too quickly and ended up with a huge bubble right in the center—it drove me nuts!
It’s also a good idea to pour in layers if you’re using multiple colors or additives. This way, you can create breathtaking swirls or layers that will wow anyone who sees them. I typically allow each layer to cure before adding the next, which also helps prevent muddling of colors.
And here’s a pro tip: keep your workspace tidy! Resin-making can be messy, and you want to focus on the art rather than cleaning up sticky spills.
Finishing Touches
Sanding and Polishing Your Candles
After my candles have cured, I like to give them a little TLC with sanding. This helps get rid of any rough edges and makes the surface smooth. Using different grits can help refine the surface even more. It’s a step I consider crucial in achieving that polished look.
After sanding, I usually polish them up to give that glossy, professional finish. A bit of resin spray can also enhance shine and provide some extra protection. It’s all about making your candles look that much more impressive!
If you’re aiming for a flawless finish, make sure you’re sanding in a well-ventilated area—those dust particles can be a bit of a nuisance if inhaled.
Add a Wick and Scents
The fun doesn’t stop at just making the candles; now it’s time to add a wick! It’s best to choose wicks that are proportionate to the size of your candle for an even burn. I usually go for cotton wicks, but wood wicks have become a trendy option for their gentle crackle sound.
Don’t forget about fragrances! Adding essential oils before pouring in the resin not only scents the candle but also can enhance the visual aspect if you’re using glow-in-the-dark additives. The aroma can be the cherry on top, making your environment feel cozy and inviting.
Just be careful with the amounts; a little goes a long way. I’ll usually test different scents in small batches first to find the right balance. Experiment, and enjoy the scent journey!
Packaging and Presenting Your Candles
Once my candles are complete, I always think about how to present them. Crafting beautiful packaging adds a personal touch that’s perfect whether you’re gifting them or selling them. I love using recycled materials whenever possible—they add uniqueness that you just can’t buy.
Gift boxes, tins, or even simple twine and tags can make a huge difference. I’ll often personalize tags with the scent or a little backstory about the candle, and it really makes customers go wow!
Above all, when it comes to packaging, don’t forget about safety. Make sure you provide clear burning instructions to your buyers, which not only safeguards them but also shows you care.
FAQ
1. What materials do I need to start making crystal resin candles?
You’ll need epoxy resin (or your resin of choice), wicks, molds, color pigments, essential oils, and possibly some additives like glitters or dried flowers!
2. How long does it take for resin candles to cure?
Typically, resin candles need about 24 to 48 hours to cure fully, but always check the manufacturer’s instructions on your specific resin!
3. Can I add scents to my resin candles?
Absolutely! Just mix in essential oils or fragrances that are compatible with resin before pouring. Remember, a little goes a long way!
4. What should I use for a mold?
You can either purchase silicone molds or make your own using materials like silicone caulk. It’s all about getting creative!
5. How do I ensure my candles burn evenly?
Choose a wick that matches the size of your candle and consider doing a test burn beforehand. Different wick sizes can affect the burning experience significantly!